Beast of Reincarnation Best Build — Skills & Attributes
Updated August 8, 2026 · Facts cross-checked against the sources listed below
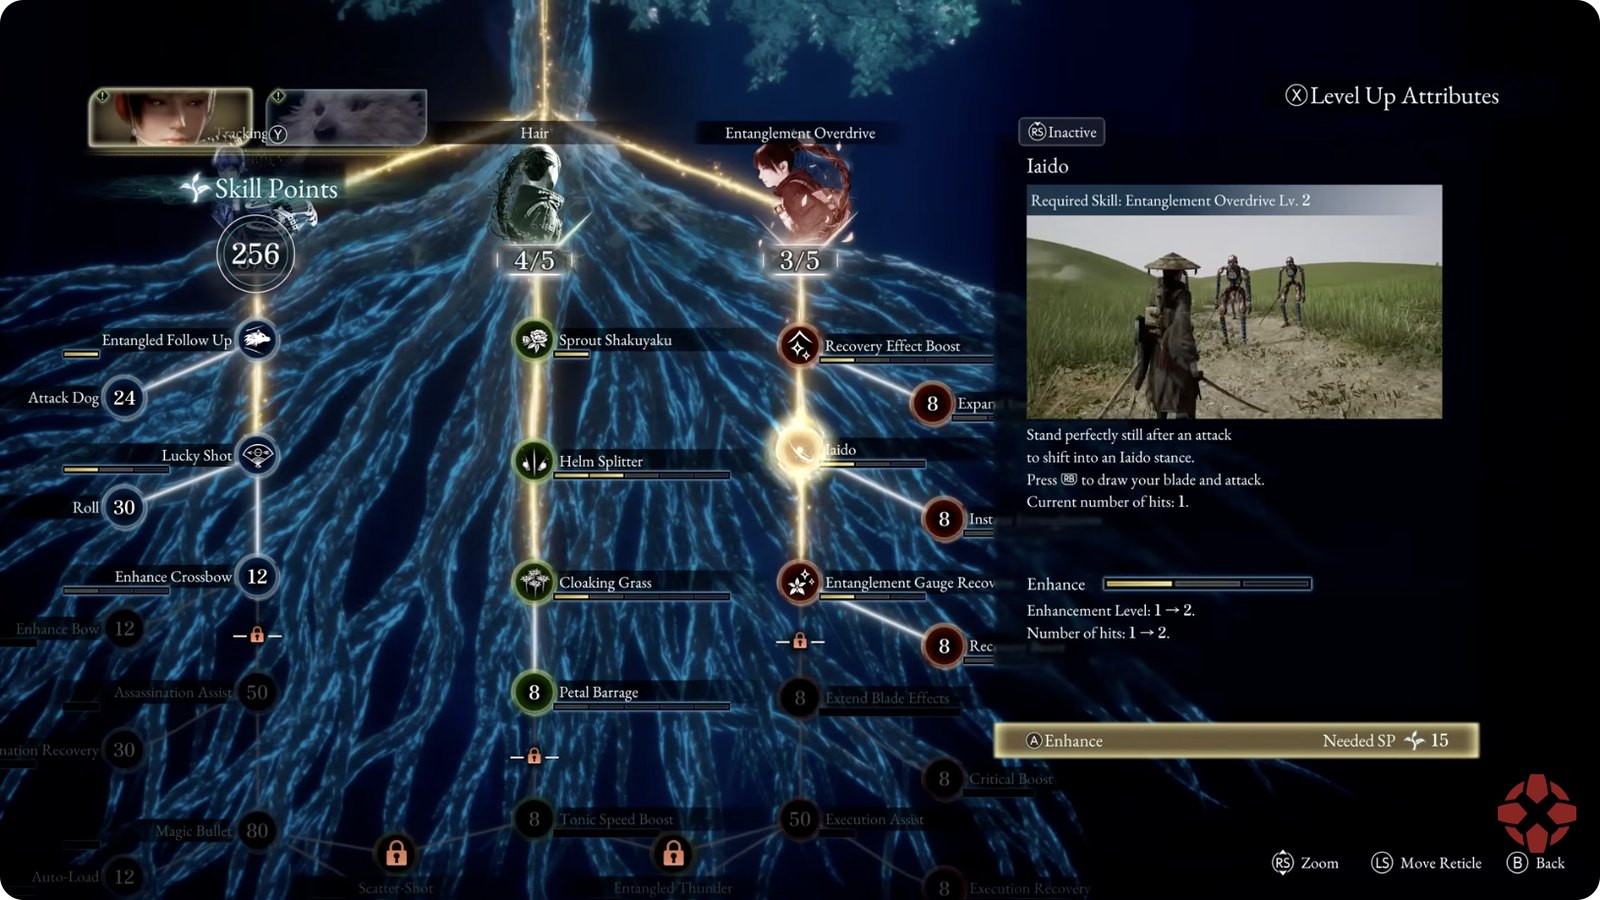
Attribute Priority: Strength First
Both major build sources agree: Strength ≥ Florescence > Vitality. Since parries and dodges can avoid damage entirely, HP is the lowest-value stat — offensive attributes also gate Emma’s and Koo’s main skill unlocks. A simple loop that keeps everything moving: put 2 points in Strength, 2 in Florescence, then 1 in Vitality, and repeat.
Stat effects, now confirmed across four sources: Strength raises Attack and Defense, Vitality raises HP, and Florescence raises both HP and Skill Power — which is why it beats Vitality in the rotation. Three of those four say Vitality raises HP and nothing else; one wiki alone also credits it with Critical Rate ⚠ minority claim. Attributes are leveled at campsites or the Cleanse Walker’s Attribute Portal, separately for Emma and Koo. Both characters cap at level 100 — a first playthrough typically ends in the 40s, so max level is NG+ territory.
Unlock Thresholds Worth Rushing
- Strength 9 — Iaido: Emma’s signature high-damage draw attack.
- Florescence 9 (+ Tracking Shot level 2) — Roll: replaces the weak default sidestep entirely.
- Vitality 9 — Helm Splitter: aerial AoE that staggers groups.
Emma’s Core Skills
- Entanglement Overdrive (max to 5): extends the time-stop window — the build’s biggest damage multiplier.
- Expand Entanglement Gauge (max): takes the gauge to 7 charges.
- Tracking Shot (5): ranged attacks gain blight, tracking and pierce.
- Lucky Shot for ammo economy, Recovery Effect Boost for healing value, and Execution Assist so Koo follows up your Lethal executions.
Koo’s Skills and Bloom Arts
Prioritize Koo’s Florescence, then take Guard (5) and Taunt so Koo can hold aggro while Emma charges parries. For Bloom Arts modules, the standout picks are Swamp Summoner (slow), Full Bloom Crit (guaranteed crits), Resonance (refunds Emma’s gauge) and Dual Edge (HP-for-damage trade).
Endgame: Element-Status Builds
The endgame consensus that emerged this week is element alignment: match your sword, ammo, Spirit Stones, Koo’s Bloom Art and Koo’s Charm to one status effect, and swap loadouts per boss. The three proven templates:
| Build | Core Pieces | Why It Works |
|---|---|---|
| Shock | Thunderwave Sword or Fall Thunder + Lightning ammo + Koo’s Javelin + Shock Charm | Paralysis opens execution windows |
| Poison | Hunter’s Sword + Poison ammo + Koo’s Dokuzeri: Fang + Poison Charm | Damage keeps ticking while you play safe |
| Acid | Hazebringer + Acid ammo + Koo’s Nobudou: Burst + Corrode Charm | Slows enemies and shreds defense |
All three run Homing Shots as the core Spirit Stone. For stone mechanics, top picks and synergy sets, see the new Spirit Stones guide.
If You Misallocate
Respec unlocks in Chapter 2 and costs 100 Amber per attribute point, with skill points refunded free — full details in the respec guide.